by Peter West
Education is constantly evolving. The emergence of the Lightboard is part of this evolution, allowing learning and teaching to become more flexible and effective.
Just as movies moved closer to ‘reality’, from silent movies to ‘talkies’, then to colour, HD televisions and now ultra-high definition televisions, tutorials for students are moving closer to the ‘real thing’.
A Lightboard allows teachers with little technical knowledge to create amazing, ‘more human’ online video resources that are closer to the ‘real’ classroom experience, but with added advantages. Lightboard tutorials provide a more ‘personal’ window into learning for students as facial expressions, gestures and the subtleties of person-to-person interaction are available at any time and from any location in ways not possible before.
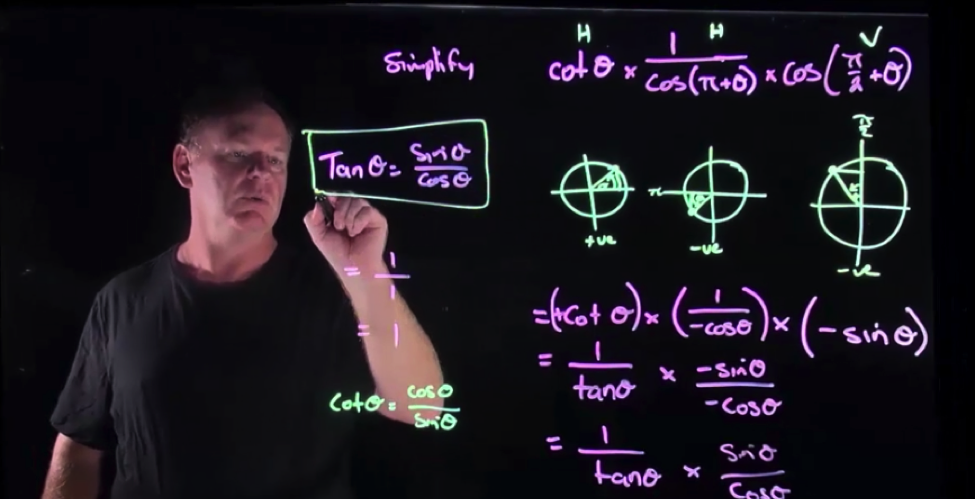
Patrick Dare, a Mathematics teacher at Saint Stephen’s College, explaining some theory in a video tutorial created using the Lightboard.
The videos are a step beyond the Khan Academy style tutorials that have become world famous and extremely popular; they are much more than an on-screen pen and a disembodied voice.
When added to an online learning environment (OLE), the tutorials can also be viewed any time and from any location.
Eliminating ‘Groundhog Day’
Lightboard tutorials, when combined with a suitable OLE, are the perfect supplement to the classroom. They allow core concepts to be covered independently or to be revised in a full and rich fashion when the student feels the need. Traditionally a concept is taught in class and the student takes notes for review later. However, if understanding is incomplete, the notes may not be sufficient to allow full understanding. A Lightboard tutorial allows the student to review the material over and over, and then ask specific questions of the teacher in class the next day if necessary.
These tutorials do not replace the teacher. They instead allow deeper, more specific and individualised learning to occur when the student is with the teacher.
As an example, a Maths student recently had difficulties with some concepts the night before an exam. She emailed her teacher, who advised which tutorials to review online. The student was then able to solve most of the problems, and came to see the teacher the next day about the few, specific areas she still needed help with. Without the tutorials she would have remained confused and frustrated.
Many teachers also find themselves explaining a core concept over and over, even after teaching the concept in class. Lightboard tutorials allow these concepts to be explained once and then viewed as many times as necessary by students who encounter difficulties. Those who understand can move on, while the teacher can then focus on helping those students who require an alternative explanation. Everyone wins.
What is a Lightboard and how is it built?
A Lightboard is a sheet of special glass which is flooded internally with light from LED strips. The teacher writes normally (not backwards) on the board with coloured markers while teaching a concept or solving a problem. A video camera captures the ‘lesson’. The video is then reversed using software such as Camtasia, and is placed in an OLE so that students can access it at any time and from any location.
There is a lot of information on how to make a Lightboard available on the internet, but our primary source was www.lightboard.info . The site was created by Michael Peshkin from Northwestern University. He is a pioneer of the Lightboard and the site provided all the information needed.

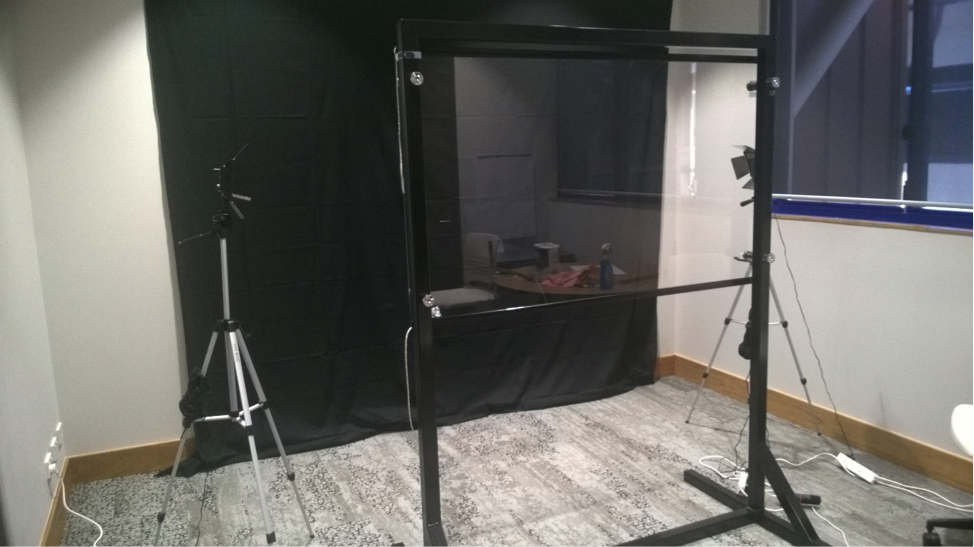
An early setup of the Lightboard just after it arrived. The LED strips were too long, and can be seen hanging out of the end of the tubing on the left side of the frame. (The LED strips were trimmed to length later.) We initially used only two lights on tripods and had black cloth as a backdrop. Having black cloth as only a backdrop created reflection problems and lighting problems due to the windows.

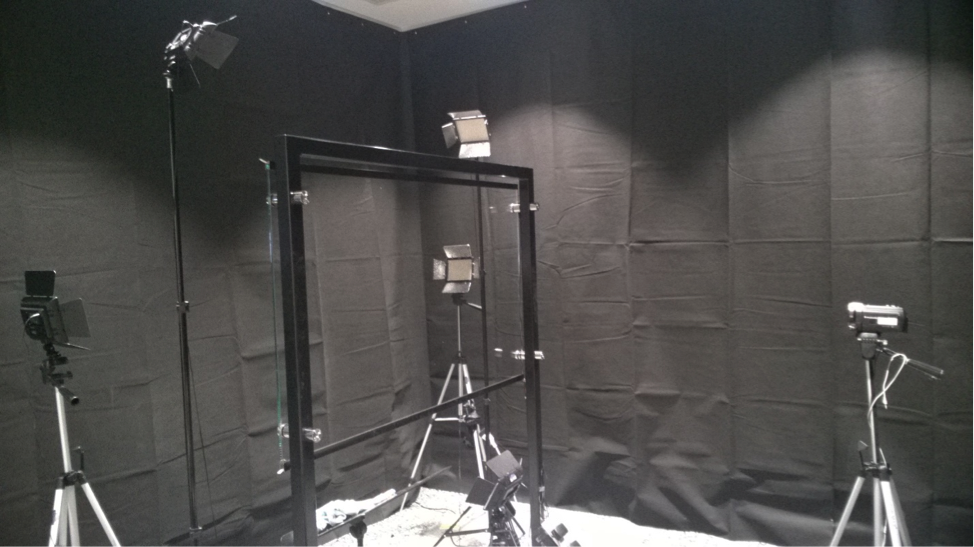
The Lightboard in its current form. The room has three walls completely black and there are now five lights to allow better lighting of the teacher. The black channels at the top and bottom of the glass house the LED strips that flood the glass with light. The video camera is visible on the right side of the picture.
Building the Lightboard
The glass and stand were the most difficult part. However, we found our local glass supplier was up to the task. We provided them with the plans from lightboard.info and they ordered the special high transparency glass and built a custom stand, complete with channels at the top and bottom of the glass that the LED strips lie in.
An early setup of the Lightboard just after it arrived. The LED strips were too long, and can be seen hanging out of the end of the tubing on the left side of the frame. (The LED strips were trimmed to length later.) We initially used only two lights on tripods and had black cloth as a backdrop. Having black cloth as only a backdrop created reflection problems and lighting problems due to the windows.
All of the ‘extras’, such as the LED strips, LED lights and blackout materials were ordered online. It takes some time and experimentation to get the lighting right, and we eventually settled on five lights with tripods of various heights and positions. We initially used a directional microphone wired to the video camera. However, the quality of the sound needed to improve and there was hum on occasion due to induction from the electrical leads. We now use a wireless microphone.
The Lightboard in its current form. The room has three walls completely black and there are now five lights to allow better lighting of the teacher. The black channels at the top and bottom of the glass house the LED strips that flood the glass with light. The video camera is visible on the right side of the picture.
The special pens used to write on the glass are inexpensive and readily available from many suppliers of office products. We also purchased black T-shirts in a variety of sizes for teachers to use if necessary; colour and type of clothing is important when recording presentations.
Location
A Lightboard is not easily transported and it is not something used in a live classroom environment. It requires a dedicated room. Luckily, we had one. The room also needs controlled lighting. We initially had black cloth as a backdrop only, but soon moved to having black material on three of the four walls. We also covered the windows to ensure we had consistent lighting that isn’t impacted by how sunny the day is.
Removing the ‘technology barrier’
Creating a Lightboard tutorial is easy. Any teacher who can stand at a board, write and talk can create one. Converting the video to a useable format and loading it into the OLE is easy, and the process can be taught to anyone.
However, we decided to remove every technological barrier by having a member of staff take the recorded video, rotate it so that the writing is the ‘correct’ way and then save it to the appropriate location in the OLE. While this adds a staffing overhead, it is worth it in my opinion.
Making learning more flexible
Learning doesn’t occur only in the time allocated to a class during a school day. We need to leverage technology to allow students to learn when they are ready, and in ways that transcend written notes or a text book. The Lightboard combined with a robust OLE is an excellent way to facilitate this.
Videos demonstrating the Lightboard.
This is a video to an early Maths Lightboard tutorial created by Patrick Dare, a teacher at Saint Stephen’s College. This tutorial was recorded before we added extra lighting.
This video shows you a brief explanation and overview of the Lightboard, with examples from LOTE, STEM, Maths and Chemistry.
Peter West is Director of eLearning at Saint Stephen’s College in Australia. He has over 15 years’ experience leading K–12 schools in technology enhanced education, particularly blended learning using online learning environments. He can be contacted at pwest@ssc.qld.edu.au
Note: All photos – Peter West
SUBSCRIBE TO OUR NEWSLETTER [mc4wp_form id=”4523″]


Latest posts by Education Technology Solutions (see all)
You must be logged in to post a comment.


There are no comments
Add yours